home about etsy advertising parties awards
Showing posts with label Gift Ideas. Show all posts

Tuesday, January 17, 2012

Viva La Mexico!

I am so not done talking about Christmas, nope, I'm not.

I didn't forget about the Birthday Party pictures either, it's just taking me forever to go through all 633 pictures. Yes, I said 633!

As I promised I would share our best Christmas gift ever!!!

Did you guess what it was with the title of this post??

If not here's another hint....


Our family is going on a 7 day Mexican cruise!!!

Can you hear me screaming with excitement through your computer screen?!

I'll be sipping on these

And the hubby will be sipping on these

 
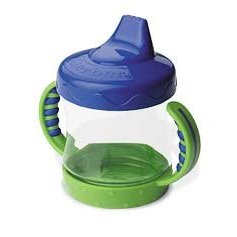
and my lil guy will be sipping on these
 

Just kidding... but not really.

We are so very excited and lucky to be able to do this.
Infact the whole family is going.
My mom & dad in law, my sister in law, her hubby & their 3 kids, my brother in law his girlfriend and their daughter and we'll be meeting my mil's two sisters and mother as well.
My mil's family is from New York and well, my hubby and I havent seen them since our wedding 11 years ago.

I still can't belive were going on this vacay of a life time... we'll my lifetime since we cant afford anything else!

YAY!

Wednesday, November 30, 2011

the nursing cover

**First of all I need to appologize for the photos in this post. I have been practicing with picnik resizing my images and putting a watermark and I dont know what I did, but half the photos ended up flipped when I uploaded them. I tried my best to fix it, but at 10:15 at night all I can think about is sizing up my pillow ;-)**


So a few times I teased you talking about the fab fabric I got and that I'd worked on some baby shower gifts, finally here it is. Well atleast one of them.

When I became a mother, I realized a lot of things people dont tell you, one of them, when you have to breastfeed.... you have to feed! It dont matter where you are.
There were times when I was shopping at Costco and when your baby wants to eat they want to eat.

From the begining I was determined to have this baby as a part of our lives and not dictate our lives so if that meant whipping my boob out in the middle of my grocery shopping at Costco then so be it.
What made it oh so much easier?
My handy dandy nursing cover!

I just loved, loved mine and so I can't think of a more perfect gift for a new nursing mother.

The first time I made one I used the one I found at Blisstree but I have since made a few adjustments here and there. I think it just depends how big or small you want the nursing cover.

I got two coordinating pieces of fabric and cut the main body at about 24" wide X 32" long and then one at 24" wide X 4" or so long for the bottom trim.
Also cut from the coordinating trim 2 more pieces about 3" wide or so and one at 10" long and one at 20" long for the straps that go around your neck.


Sew the straps together wrong side out so that when you flip them to the right side out, you'll have a nice trim edge. Then sew the trim fabric to the bottom on the large body fabric.
Press the straps nicely and also press the hem on the trim down.


Fold each side in twice and sew a straight stitch and then do the same with the bottom hem as well.

Now with the neck line, you are going to have to get a piece of plastic corset boning. I cut mine at about 15" - 17" long. Fold the hem in once and press. Then place the boning in the center of your nursing cover and fold over again and press. As you can see you made a pocket for your boning to go in.


Pin right next to the sides of the boning so it doesnt move around. You are going to take your two straps and tuck one side under the hem you just pressed right next to each side of your boning.  Straight stitch right along the edge all the way across.


You can see the boning is sewn right in there and wont move.


Go back to the straps and I sew a little square to hold it in place firmly.


At the end of the short strap I put on 2 D rings and then fold over the raw edge once and then once again to tuck it under and hide it. Then sew straight across atleast twice.


And tada!
There you go, super stylish and super convenient.
A life saver in fact!

This one I almost wanted to keep and have another one case it was too cute!
Please dont mind the mess behind me in the pix!
(always keeping it real)


Another update... here is the pix! thanks for waiting!

I'm linking up with the parties listed at the bottom of my page.
Go check them out!

**UPDATE**
Oops sorry I just realized I forgot to upload the final picture!!
Please be patient, it will be up later this evening.

Wednesday, January 12, 2011

Sewing with bias tape

I was lucky enough this weekend to spend some time learning to sew with bias tape. 
I had one previous encounter with the evil creation about a year ago and it was so bad, I havent looked at the stuff since. Well I have a new attitude and a little more patience (still working on it) so I decided to take the time and read up on it and learn how to use it.

I found a great tutorial on Prudent Baby for a pot holder a while back, oh the fabric is too cute! My Sifu (martial arts instructor) and good friend bought this quilting fabric that he used to recover his kitchen chairs and gave me the leftovers. I just knew thats what I wanted to make.

Already quilted fabric is more expensive but it cut a step out of the process for me.
I'm not sure of the type of batting on the inside so I'm not sure if it will be heat retardant, I'll make sure they use the potholders for display only.


Then it was time for the bias tape part. I went to the tutorial and read probably halfway through and went for it.... WRONG... FAIL


Well actually not completely. But a word to the wise, read all the way through the tutorial and dont think you've got it all figured out. I missed the part about going around corners so I got some sucky corners going on.


I also didnt know you were supposed to open up the bias tape and sew the under side first.
Well, its a process and I'm learning.
I think I didnt do too bad for winging it though.
Here's the first one.


By this time I decided to read through the entire tutorial and leave my computer on as quick reference. The second one I made went by much easier. I still need practice with the corners though.


Tada! I like the way they came out and this was great practice for me. I've learned a few things along the way including now I know why people make their own bias tape. Its easy to go through a lot of it and it gets kinda expensive.
I think I just might be adicted to bias tape, it looks so good. Gives it a real finished look.


We're going over to their house tonight, my hubs helps to teach the kids class and we usually hang out and spend some time together after class and have dinner.
Hope they like it :-)

ps, wonder if its too late to ask for a bias tape maker... christmas is past, whats next valentines day? what kind of valentines gift is that?

I'll be linking to the parties {here}


Thursday, January 6, 2011

New Year's Gift

My friend Kai has had a tough year. He's such a great positive guy but he and his family have been hit with a lot of hard decisions this past year. By the end of the year he was feeling pretty down and not being his usual positive self. Just before New Year's Eve we were chatting and he turns his attitude around and tells me I'm gonna make 2011 my bitch.
We often exchance positive quotes to pick each other up when were having a bad day and to hear him say that, he's really kicking some butt and taking names this year.

I thought of a great way to remind him of his new 'rule' and to keep his positive attitude.
I saw this gorgeous pix on The Pioneer Woman

Makes me think of Kai so I stole borrowed it and uploaded it on picnik.
I added a bunch of text boxes and with different fonts I put on some of the quotes we share with each other.

Had to add in his new 'rule' on the bottom.
Then I printed it at Costco.


Bought an 8 X 11 picture frame at Walmart


And put it all together.


It's really hard to take a picture of a picture.
Darn flash and reflections.


I really hope he likes it and it can help him to remember to stay positive this year no matter what he faces.

Photo editing: free
Printing of photo: $1.50
Picture frame: $3.00
Total: $4.50
(sorry Kai Im not trying to be cheap)

I'm linking to these parties {here} and joining the line up is this new party


Wednesday, October 20, 2010

Burp Cloths for a Baby Shower

So the little tutu wasnt the only thing I was busy making.
I was also hard at work making these "boutique like" burp cloths.
I've made them tons of times before,
actually even sold a bunch at craft fairs.
They're a really cool way to personalize a burp cloth or dress it up to be fashionable. Cause well lets face it, it's gonna be covered in puke any bit of help to make it look nice is a good thing...and it makes a nice gift, who doesnt need burp cloths?

I pick up a back of Gerber Tri-Fold cloth diapers. Make sure its the tri-fold!
Then pick out the fabric you want to use.

Cut the fabric in a strip slightly larger than the middle fold on the daper.


Iron back the edges where you'll be making the hem. I have a picture of that coming up later.
I like to cut the corners at an angle so that when you sew it down you get a nice corner with nothing sticking out.


Just like a present!


Pin it down to keep it straight as you sew.
You might also want to wash and dry them first because they will shrink.
I dont, just cause I'm lazy, and I know they'll wash em again before baby is born anyway.


Here is where I iron the fabric flat where I am going to sew.
(yes I made more than one... more than one shower you know)


Here it is pinned.


The type of stitch is up you to. Here I just used a basic stitch. I've used the zig zag pattern before and the really tight zig zag one that covers the entire edge.
How's my sewing ligo? hahaha can you tell I aint no pro? LOL


Here is the finished product.


I always make them in pairs, cause two is better than one right?
Ok that was cheezy. Sometimes I make matching ones and sometimes I make different fabrics in the same color scheme.

Great gift I'm tellin ya!

I'm linking to:


Tuesday, October 19, 2010

Little Baby Tutu

Maybe it's because I was a tomboy.
Maybe it's because I live with only boys.
Maybe its because under my tough exterior I am just a little bit of a princess on the inside.

Whatever the reason, I really like making these totally adorable tutus.
I am one day going to make me one to wear around the house, I promise you that!

A friend of mine just found out she was having a girl. At every doctor's appointment baby had her legs closed and was keeping it a total secret what she was. Two baby showers down, only 4 weeks before baby arrives and tons of green and yellow, they find out its a GIRL!

I was so happy to be able to give them something pink for their little girl.
Not to mention I was sooo excited to make them a tutu since months ago she had posted on her blog that if she had a girl she would totally dress her up in one!

I decided to go with white and 3 shades of pink tulle; light, fuchia and hot pink.


 First I cut them into 15" strips. The lenght will end up about 7" or so long.
The white tulle was 6" wide while the pink ones were 3" wide.


I cut a piece of elastic about 13" long and sewed the ends together. The elastic should be snug but not too tight or too loose either.


I put the elastic around my thigh (yes thats my thigh, dont look too close at it!)
and I looped the tulle around the elastic making sure the ends were even.
Then I tied them in a double knott.


Continue doing this one after another in a row.


In between the white I tied the pink. My pattern went 3 white, then 4 hot pink, then 3 white, then 4 light pink, then 3 white, then 4 fuchia, then 3 white again, and over and over repeating until all the elastic is covered.


Honestly there was no rhyme or reason to the pattern I chose it was completely random.


Here is the tutu getting fuller.


And here it is all done. The more tulle you use the thicker and fluffier it gets, its totally up to your own personal preference as to how big you want it to be. I chose for this not to be too big since its made for a newborn and they're small.


All done!


So here's my question... how do you photograph a tutu when you dont have a model??


Im linking to:


Thursday, August 26, 2010

Fall Favorites Gift Exchange

I've never done a gift exhange before!
So I'm excited to participate in the

Fall Favorites Gift Exhange


Hosted by Every Crafty Endeavor.
Head on over if you want to participate too!!!

We dont have fall here in Hawaii, so I've got to get creative!

LinkWithin

Related Posts with Thumbnails